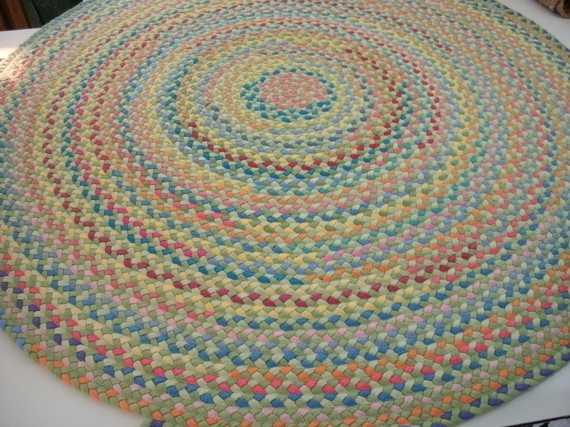
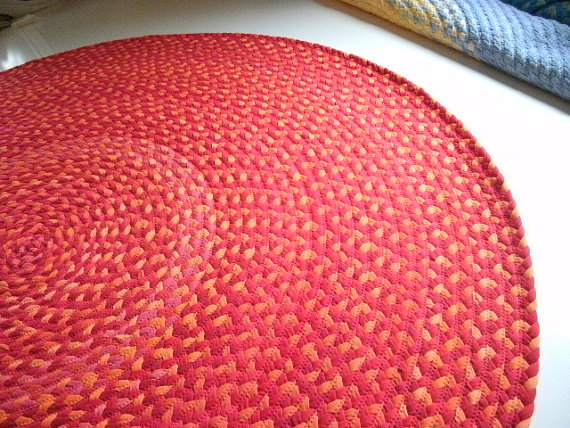
Коврики из старых футболок

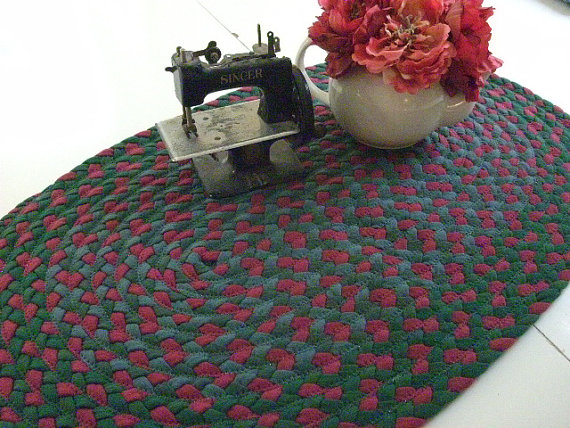
Это несколько новая технология изготовления ковриков из старых футболок. Сплетенные косички, сверху прострочены на машинке. Идея вроде бы стара, но смотрится по-новому. Итак, новая жизнь старых ковриков из футболок!
Лаура – швея со стажем более 20 лет, обладающая большим вкусом. Именно поэтому ей удалось построить успешный бизнес на том, на чем пытаются зарабатывать многие: переработке футболок из магазинов секонд – хенд в ковры и коврики.
На изготовление одного ковра из футболок у нее уходит 3 -4 месяца. (Что-то многовато...)


Как нарезать футболки и спрятать концы (на языке оригинала) Источник
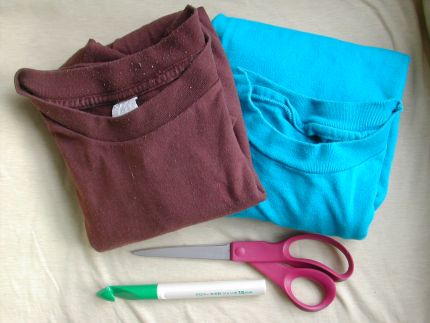 | This is all you'll need to make your own upcycled rag rug. |
1. Cut the shirts into strips, approximately 1 inch wide. Starting at the bottom, cut in a spiral all the way up the body of the tee, and roll the strip into a ball. Stretch it out as you wind so that the jersey curls up into a cord.
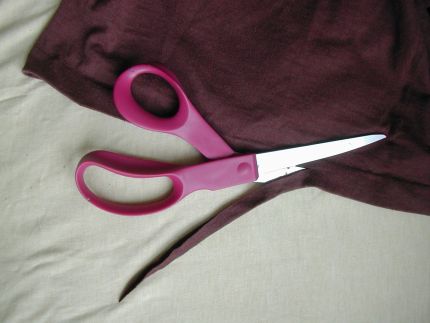 | Begin cutting at the bottom hem of the shirt. I cut this part half as wide since it's two layers. |
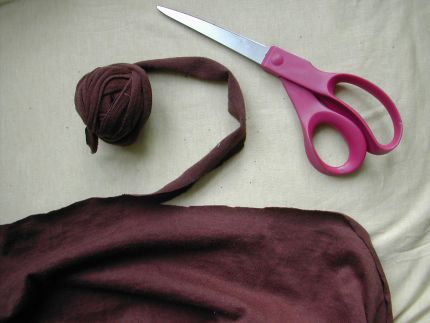 | Wind the strip into a ball as you cut. |
When you reach the armpits, cut right across the seams until you reach the edge of the sleeves and can't cut continuously anymore. I also cut part of my long strip into some shorter ones so that I can play with the colors.
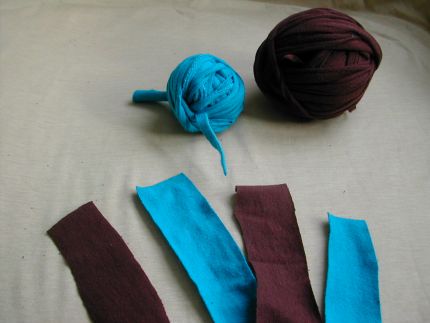 | You can work with long strips, wound into balls, as well as short strips, which will be prejoined for quick color changes. |
2. Join the strips. If you're working with long strips wound into balls, you can just overlap the two ends for a few inches when you're ready to join on a new strip or to change colors. But if you want to join lots of short strips for quick color changes, you'll want to join them first so you don't have to keep stopping. Here's how I do it: Cut a small slit in the ends of the two strips you want to join, about 1/2 inch from the end and about 1/4 inch wide.
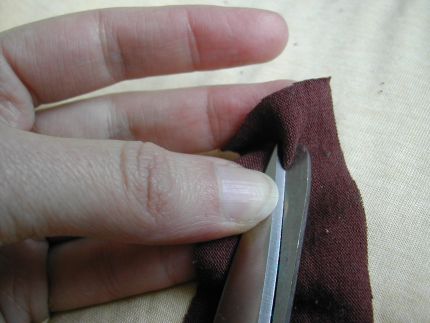 | Snip into the end of the strip to make a small hole. |
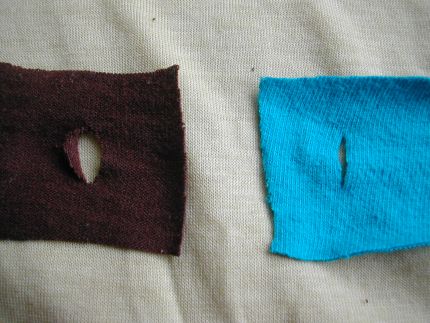 | Here are the two ends about to be joined. |
Overlap the two ends, lining up the holes, as shown.
 | Lay them end-to-end, overlapping the holes. |
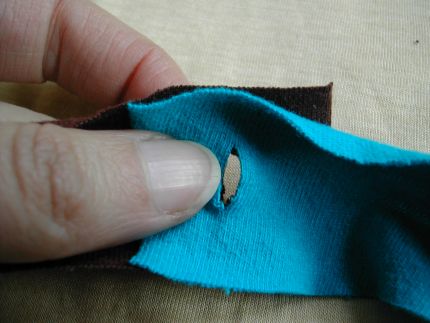
Now take the long tail of the strip whose end is on top, and pull it through both holes from underneath.
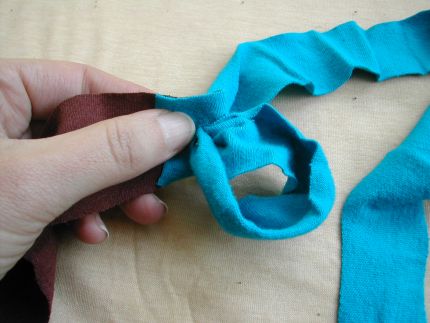 | Pull the top strip through the holes from underneath. |
Keep pulling until the entire strip has gone through the hole and give a final tug; you should have a join that feels nice and smooth and not like a knot.
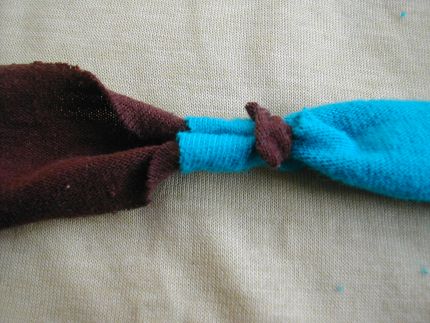 | And voila! A clean, strong join. |
3. Ready to crochet? With the jumbo hook, begin working with your homemade yarn into whatever shape you'd like—round, oval, or rectangular. I recommend single crochet for a solid, sturdy fabric, but you can try other stitches, too. Allow the strips to curl up and twist as you work to make a thick, durable rug. You'll find it can be a little more physically challenging to work at such a large gauge, but the reward is how quickly the piece will grow when your stitches measure 3/4 inch across!
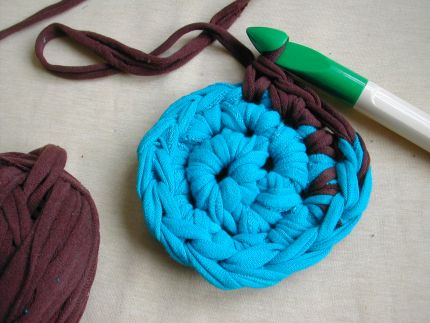 | Have fun with your colors as you crochet. |
It takes a lot of tees to make a decent-sized rug, but don't worry—there's no shortage of them! And for once, making a dent in this resource is actually goodfor the planet.
Взято тут